A quick Tour of Elsie
17 Sunday Dec 2017
Posted in Uncategorized

17 Sunday Dec 2017
Posted in Uncategorized
29 Wednesday Nov 2017
Posted in Uncategorized
And so it came to pass, that 38 years after last being registered and 32 years after I began working on her, Elsie the Morris Minor was back on the road.
The final registration process was straight forward and she passed her inspection with flying colours. At this point there is nothing left to say other than to thank my family and friends for indulging my obsession, especially over the last 3 years.
The real highlight of this project is the time it enabled me to spend with my parents and brother as we toiled for many long hour and learnt the foibles of the world of Morris Minors. These are memories that I will always cherish.
I have no idea of the final cost, I imagine it was $20K plus and at least 2000 man hours. But profit is rarely the point of restoring old cars. It is purely for the love of seeing something that was supposedly redundant and useless being bought back to a thing of value and beauty.
Elsie has been back on the road for a couple of months and she has proven to be somewhat temperamental as she finds her feet again with the odd oil leak and electrical problem but these have all been relatively easy to overcome.
I will let the photos below do the rest of the talking.


06 Friday Oct 2017
Posted in Uncategorized
Its taken a while to get back to this blog. The months have flown by. I can’t believe its October already.
So last time I wrote we were just doing some final tuning with the carbs and air cleaner. We fitted the old oil bath air cleaner in an attempt to get the mixture on the carby correct. Well it fitted ok, but the bonnet wouldn’t close. The back of the oil bath filter was hitting the bonnet brace. As much as we tried with the fittings we had it just wasn’t going to happen. I still don’t know why this was the case. Anyway the paper air cleaner went back on. In the mean time we stripped the carby back down and found an issue with the jet. Rather than adjusting the mixture when turning the bottom nut the whole jet was just spinning. We put a new kit of seals in and reassembled and things seemed to be running much better than before, certainly spitting raw fuel out the exhaust was gone. The car was still blowing smoke though and we had to face up to the fact that the valve stem seals were likely stuffed. Sitting for 25 years we kind of thought that they might be but hoped not.
So began the saga of the valve stem seal replacement. I ordered 8 of the newer cup type seals and we set up on a Saturday morning. The rocker gear was removed and a piece of angle iron bolted onto the studs. This was to provide a leverage point for the home made spring compressor tool. The cylinders were connected to the air compressor by way of a home made connection and pressurised to ensure the valves didn’t drop into the cylinder once released. My brother had a home mode valve spring compressor tool that he made up for his LB Lancer in the 70s and so this was put into action. It worked perfectly for removing the valves but proved less successful when putting the valve springs back in. A trip down to the local “we have pretty much everything” tool store (not one of the franchise stores, a small locally owned business) and we picked up a great valve compressor tool. So it was we worked through the valves. About half of the seals had split as we pulled each one apart. The new seals were put in place, the springs and assembly replaced and so it was at the end of the day the rocker gear was put into place, the head re-tentioned and the tappets adjusted. Before putting the rocker cover back on the engine was turned over by hand …and we watched, before our very eyes several of the new seals pull off the valve guides and ride up the valve stems. Closer inspection with a torch revealed that at least two of them had been torn.
Expletives from everyone involved, some phone calls and Googling. The issue? You have to leave out the oil shrouds when moving to the new type of seals. So, replacement seals were ordered and the process was repeated. This time, when we wound the engine over by hand and inspected, two of the springs from the top of the cup seals could be seen to have popped off the seal and were riding up the valve stem. More expletives, more phone calls. The issue this time? Despite the valve guides having a ring notch and despite the seals having a ridge that perfectly mates with the notch, you have to push the seal past this point and all the way down, otherwise on compression the top of the spring hits the top of the seal …and things pop off.
So, third times a charm. I’m pretty proud to say that by this stage we had gotten extremely efficient at the process. From removing the first head nut to having removed all the springs, repositioned the seals, reassembled, tensioned and adjusted the tappets took one hour and fifteen minutes. This time, everything looked perfect. The rocker cover was replaced and the engine filled with oil.
Ok, at this point I need to mention that right before we decided to replace the valve stem seals, we were doing a final tune. At the end we switched the motor off and I glanced under the front of the car. “Theres a pretty big pool of oil here …” putting the head under the front end revealed oil dripping at an alarming rate off the bottom of the sump. Under the car and feeling around the sump there was no sign of oil coming down from above, it literally seemed to be coming directly out of the bottom of the sump. Wiping the bottom of the sump with a cloth turned the drip into a steady stream. The sump had blown through a pinhole ! So we pulled a spare sump out from under the house, did some panel beating, repainted, ordered a new bottom seal kit and replaced the sump. Whilst the sump was off it gave us a good opportunity to inspect the bottom end of the engine to see if sitting for 25 years had done any sort of damage. The bottom end looked in pristine condition which was a relief!
So back to the valve stem seals. The engine was started up and run up to temperature. It quickly became apparent that we had been successful. The smoke from the rear end had all but vanished. Almost there!
The last piece of the pre-rego puzzle was the speedometer. Whilst we were getting a speed reading, the reading was low and the odometer wasn’t ticking over. The unit was removed from the dash and the mechanism inspected. There was a tooth missing from the odometer drive. Onto eBay and I managed to pick up a second hand unit for $50. It arrived and of course didn’t seem to be working at all when spun up on a drill. So the unit was stripped down. It was heavily gummed up. Components were cleaned with white spirits and reassembled. We were getting a reading but it was nowhere near reading the correct speed. My thoughts were that the magnetic pole in the back had lost much of its magnetism over time. So I stripped the unit back down and after doing some research, decided to try a home remedy. The magnets were wrapped with insulated wire and the ends splashed across a car battery several times. Though subtle there was definitely an improvement. So the unit was reassembled and tested. Much to my surprise it actually looked pretty good. The unit was rough calibrated and we were good to go. Rego Time!

Commercial Spring compression tool

Cylinder pressurising adaptor

The old perished valve stem seals

Air Compressor connected to the cylinder, spring removed and new seal in place.

Replacing the Spring. The angle iron provided a leverage point for the home made tool.

The bottom end of the engine with sump off

The replacement sump painted and ready to fit

Under the car with the sump replaced

Odometer drive with missing tooth
15 Saturday Apr 2017
Posted in Uncategorized
Here is a short video of Elsie out and about in the neighbourhood whilst we did some tuning.
After this we have decided to do away from the pancake air filter and reinstall the original oil bath unit, replace the coil and then perhaps send the carby off for a refurb.
There was also a mysterious spray of oil that seemed to have come from the cork gasket on the rocker cover. Not sure what is going on with this, bit weird. Some more investigative work needed.
The front drivers side suspension needs about 15mm lift on the torsion bar adjustment.
Also after this video we replaced the webbing on the front seats (my brother isn’t nearly as short as he look in this).
18 Saturday Mar 2017
Posted in Uncategorized
Well February has been and gone and as with every other deadline with this project, we didn’t quite meet expectations, but there has still been a lot of progress.
Today the interior marked pretty much what I would call completion. With the exception of the trim beneath the rear seat, all the trim has been fitted. Sound deadening has been installed and carpets are in. The seats are all bolted in, door cards fitted, and pillar trims fitted.
Over the last several posts, the trauma of fitting the hood lining has been fully detailed. The new hood lining arrived from England just before Christmas. Everything was carefully measured, the lining laid out and the bows and front timber panel transplanted from the old to the new. This time it was pretty much in and done within an hour. Its amazing how much difference that extra inch of length made!. The only small disaster was one of the rear window hooks snapping off as we tentioned the rear hood wires. On consideration it was thought that the mounting of the rear window rubbers would hide the slightly different contour of the lining around the window which proved to be correct.
This brings me to the window installations. We had a professional come in to do this and thank goodness. Under no circumstances would I suggest you do your own.. We had several front and rear glasses to chose from so selected the ones with the least scratches. I had ordered new rubbers for both front and back which arrived with the other items prior to Christmas. The front window went if fairly seamlessly in about half an hour, then the plastic chrome locking strip had to be inserted. I commend the patience of the installer. Due to the tight fit, this process took over an hour, and unfortunately a portion of the Chrome finishing failed and peeled off in one section, but at least it was in. Now the rear window. The rear window was offered up and pushed, and nudged, and hit, and sworn at but there was absolutely no way it was going to fit into the opening. After about an hour I could see the installer reaching the “I really don’t know what to do” stage. It was at this point we got another one of the glasses out and compared the two. Same number stamp on the glass so they should be exactly the same. We laid the two glasses over each other …and they weren’t the same. The one we were trying to install was about 5mm wider than the other. So we fitted the rubber to this alternate glass, offered it up to the opening and with a bit of a suction sound it pushed into place with one shove. Another half an hour and it was in. Another case of no two morris’ being the same in any way.
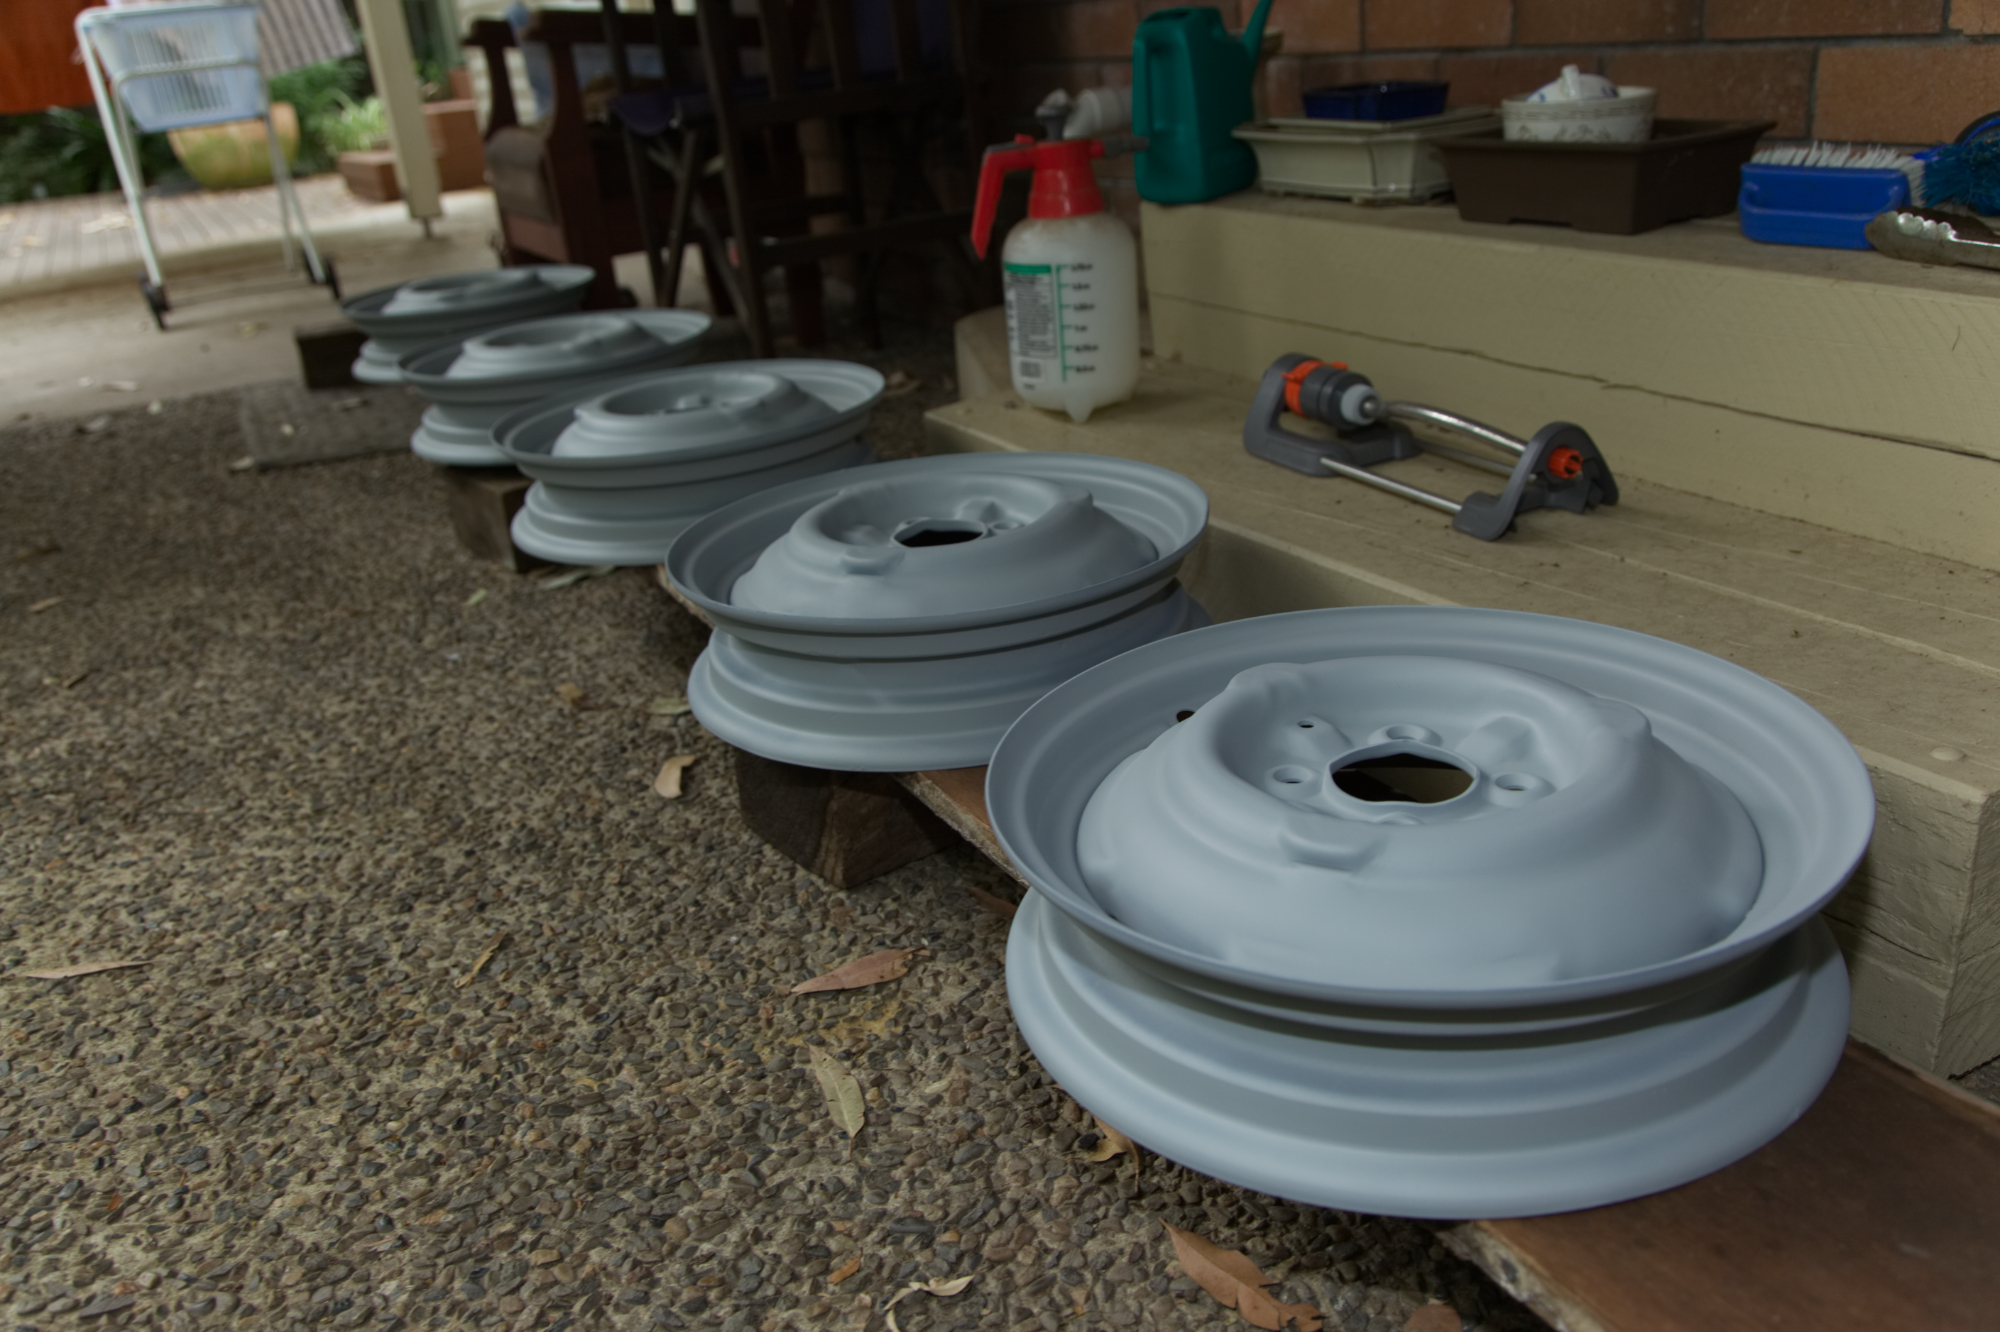
So on we continued, wheels were sandblasted then primed and sprayed in Old English White. The 155 x 14″ tyres arrived and were fitted then installed on the car. This showed us two things. One was that the front drivers side torsion bar needed a little more adjustment upwards, and two that a 155 tyre is just wide enough to stop the wheel fitting into the spare wheel compartment above the petrol tank. A 145 tyre will be ordered and fitted once the car is registered. Until then the spare can sit on the shelf in the boot (trunk for Americans).
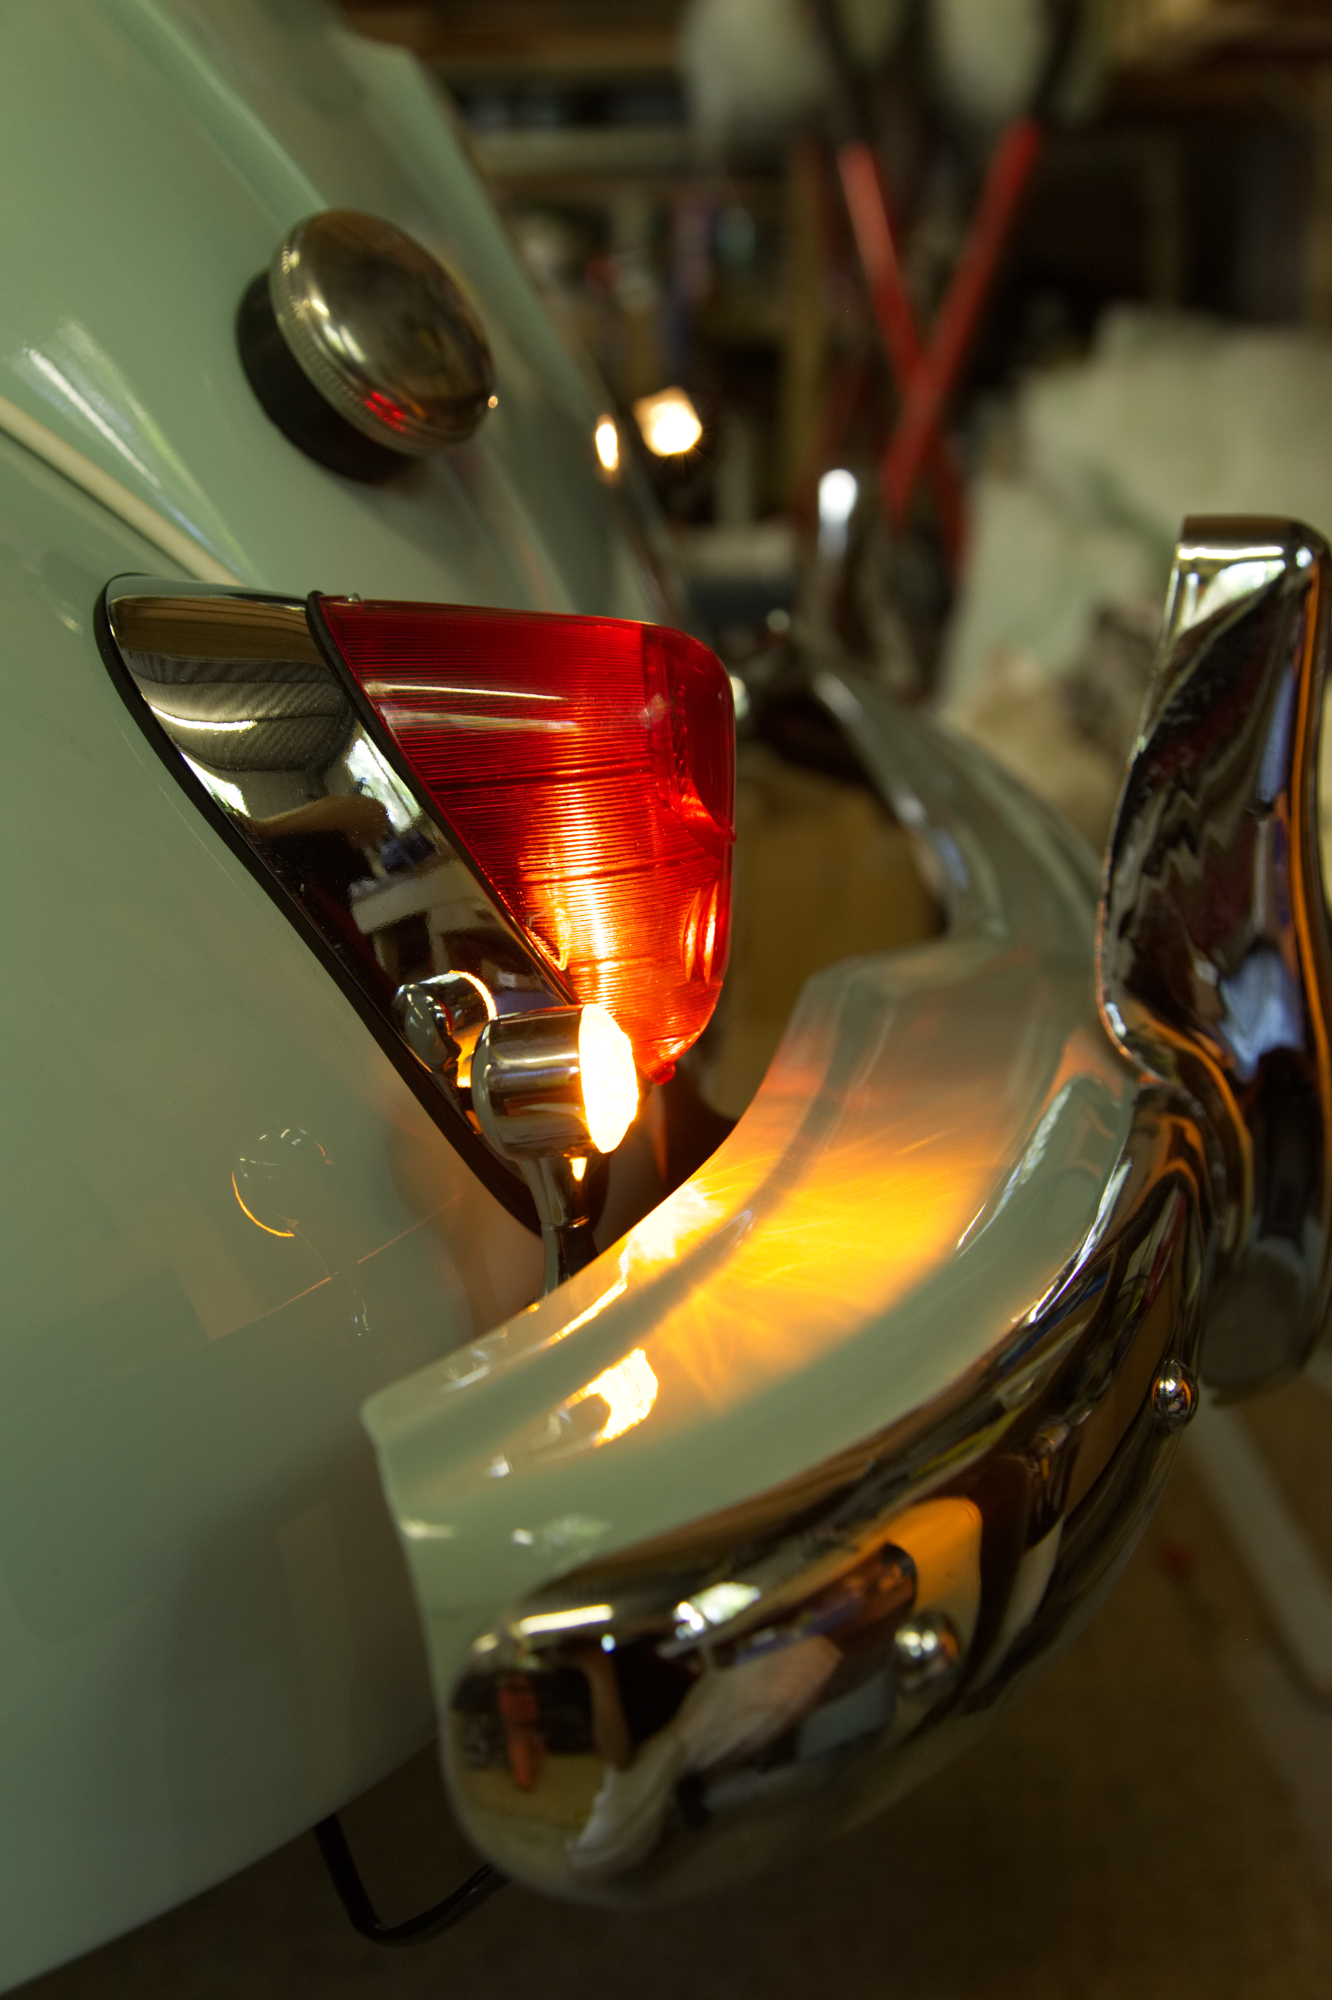
A day was spent doing the final wiring, with headlamps, LED indicators, horn, stop lamps, side lamps all wired and tested. The stop lamps did not work first up, nor did the horn. Doing a bit of bypass wiring I found that the horn was working fine if connected directly across the battery. I traced it back to a voltage drop across the fuse in the fuse holder. These were original fuses. I had purchased a couple of new fuses so I fitted them, cleaning up the fuse housing at the same time. Low and behold the horn and the stop lamps all started working. Lastly the wiper was wired.
So that brings us up to date. Left to do before registration is :Fit the rear winding window dust felts (glue in). Fit the door seal around all four door openings. Recondition and fit two trafficators. Wire interior lamp to dash switch. Fit after market Oil Pressure /Temp gauge. Trim the front drivers side suspension. Change over fresh fuel and tune. That’s about it. The list is literally down to half a dozen item. The next post should be a registered car!


10 Tuesday Jan 2017
Posted in Uncategorized
Tags
Bonnet, boot, interior, lights, Morris Minor, restoration, trim, wiring
The Christmas break say the South Coast of NSW suffering through heat wave conditions …the perfect time to spend 8 hours a day in a tin shed. Several days it would have reached 40 degrees celsius under the roof.
A lot of progress was made though and things are at the point where I can actually contemplate a date for the car to go off for its blue slip
At this point I am hoping for the end of February.
Basically the process is just now bolting things together. Guards and doors are all fitted. New rubbers throughout the doors including quarter vent rubbers and rear quarter windows. A new lock has just arrived for the drivers side front door so that will be installed shortly.
Bonnet and boot fitted, boot rubbers installed, bonnet and bonnet latch aligned.
Headlamps fitted and sidelights installed, well one sidelight. We had put a small split in the rubber boot of one of the sidelights at some stage so it was impossible to get the chrome ring to hold in. Another should be hear shortly.
Bumpers assembled and refitted. One of the repaired bolts on a hockey stick failed so it was decided to just order a new pair.
Last weekend I did some work on the remaining electrical. The wiring loom is actually for a later model that included front and back indicators so sorting that out took a bit of doing (as the wiring diagram I had didn’t was for the older model). As I am putting LED indicators front and back, we discovered that the flasher canisters were not going to work without adding load resistors. After some investigation I decided to order electronic flasher canisters that are built to handle the lesser load of the LEDs.
The upholstery and other trim was pulled out of storage, checked and then rough fitted just to make sure it is all looking ok. It will be pulled back out so do the hood lining and to fit the floor insulation.
Any that have read my last post will know what a stressful process replacing the hood lining has been thus far. The new vinyl arrived from England just before Christmas. I will be making some efforts to get it ready for installation this weekend.
Other than that, the tyres are the only big ticket item remaining. Two additional rims will be sandblasted this week and I picked up a half litre of old english white this afternoon ready for spraying them. Getting tyres to fit the original rims has been an issue however after some emails this afternoon I think I have this resolved. I will be fitting 80/155R14 radials. A bit costly at $135 each plus fitting but should look the part whilst still giving some reasonable rubber connection to the road.
So as they say, a picture speaks a thousand words……only one or two more posts to go!


![]()
![]()


![]()


14 Wednesday Dec 2016
Posted in Uncategorized
If you have read this blog from the start you will realise that this project started a bit of 30 years ago. Many of the components were purchased at that time, including a lot of the rubbers, the upholstery was done and then when the project stalled it was all put into storage.
I guess I hadn’t really thought about this much. We pulled the boxes out and everything seemed to have survived the ravages of time OK. In hindsight I was completely forgetting what was going on in the world back then. The Internet was not a thing. All the parts were purchased through mail order and whilst there were a couple of small businesses specialising in Morris Minor parts there was no where near the restoration demand that there is these days. Certainly there was no thought of accessing parts from England and it would seem a lot of the parts were “best fit” out of the generic bits and pieces that were available ….and so to my tale of woe that has been the last week.
The last couple of days of last week were spent doing some more cleaning, a bit of touch up work on the paint and doing some sorting on the electricals. I also covered the interior of the turret with sound deadening material. It was decided that Saturday would be the day we would tackle installing the headliner. The headliner was made locally by the upholsterer that did the seats and he used the old liner as a template.
On Friday we decided to do a bit of prep work, pulled the liner out of storage and offered it up into the channels in the car just to see how it was going to fit.
Problem one. It just wouldn’t sit right. We pulled it back out and laid it out on the floor. It only took a few minutes to realise the problem. When the upholsterer had pulled through the side wires he had the bows sitting upside down, so when twisted around to the right way, the wires crossed at the end of each bow.. The only solution was to pull the wires out and feed them back through the right way. The old wires were quite shabby and worn and so it was decided to replace the wires with new. A roll of plastic covered clothes line wire was found in the back shed, the plastic stripped off, wire cut to length and ends soldered. The wires were then pushed back through the seems and passed (the correct way) through the loops at the end of the bows. The liner was then offered back into the car and all looked pretty good.
With the experience of Friday behind us we were pretty confident the liner would go in ok and so Saturday morning it was offered into the channels, the front board clipped into place and the liner stretched back towards the back of the car. “Hmmm, it seems a bit short”. Ok it must just be a matter of working it back and doing a bit of stretching as we go. For three hours we tried everything we could think of to stretch the liner back to engage with the “teeth” around the back window opening, but no matter how we pulled or adjusted the bows the liner seemed to be about 20mm short. After 3 hours it was decided to pull the liner out …another hour and a half to get the spring clips to release from the front channel.
We had another old torn liner with bows in storage and so it was pulled out and the two compared …and the old torn liner was about 20mm longer end to end. It seems that the headliner was made too short those 30 years ago (or the Vinyl had shrunk over that time). Either was it was never going to fit. An entire (extremely frustrating) day wasted.
Monday we moved onto assembling the doors, installing new rubbers in the quarter windows, bottom weather rubbers and window channel felts. Of course we encountered the usual array of rusted screws that had to be drilled out and re-tapped. Then the quarter window rubbers became a nightmare to install into the channel. A good couple of hours was need to get the first one to fit and in the process the seams gave way and had to be reglued. With the use of ample amounts of rubber grease and the narrow end of a timber clothes peg the rubber was pushed into place and the frames reassembled. Monday gone.
Tuesday we installed the window channel felts. Again this turned into a nightmare and the glass would just not slide with the rubbers installed. The rubber continuously rolled and gripped the window no matter what we tried. As with the other components in discussion thus far, this rubber was purchased 30 years ago. on close inspection it was decided it wasn’t really the right size for the channels and so it was decided to ditch this as well. The frames were assembled back into the doors without the glass so the doors could be fitted to the car and we will pull the frames back off and install the glass and felts once the correct ones have been sourced.
So the upshot of all this was another $500 order of parts from my good friends at Bull Motif in England. I decided not to go through the same painful learning process with the front and rear window rubbers and front quarter vent rubbers and just ordered new ones rather than trying to install the 30 year old versions. The parts should arrive early in the new year.
Oh and to add to this we Tuesday was a heatwave with the temperature hitting 39 degrees outside. Goodness knows what it was in the shed.
A final bit of light at the end of the tunnel on Wednesday. With the front doors reassembled the 4 doors and font guards were offered back up to the body. They all fitted with minimal effort and minimal paint loss. Certainly the fit was very much better than when the car went off to the panel shop so my appreciation goes out again to the boys at the shop for getting all together.


07 Wednesday Dec 2016
Posted in Uncategorized
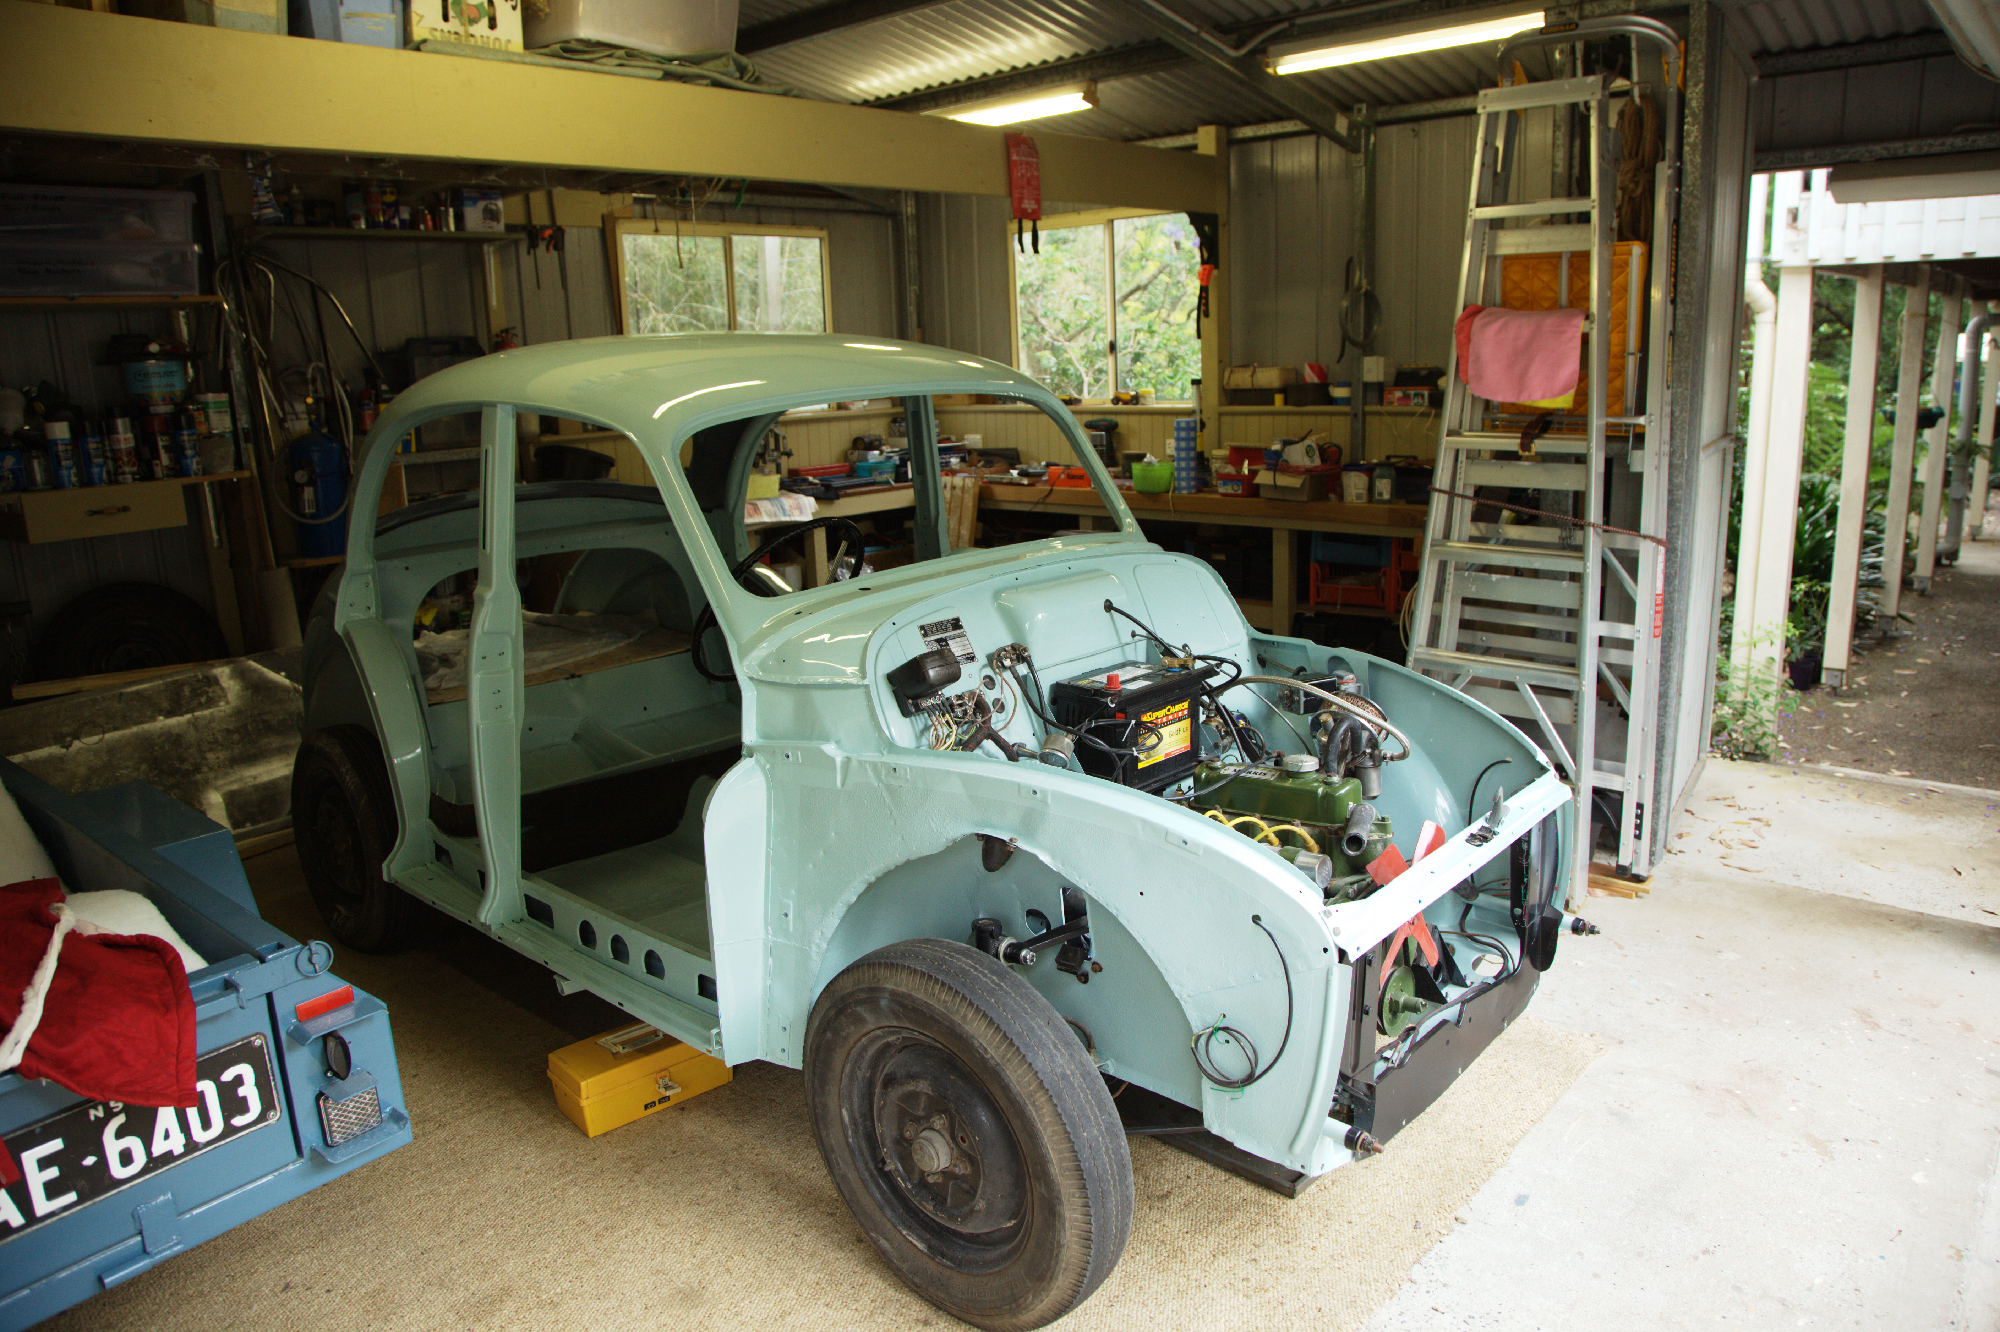
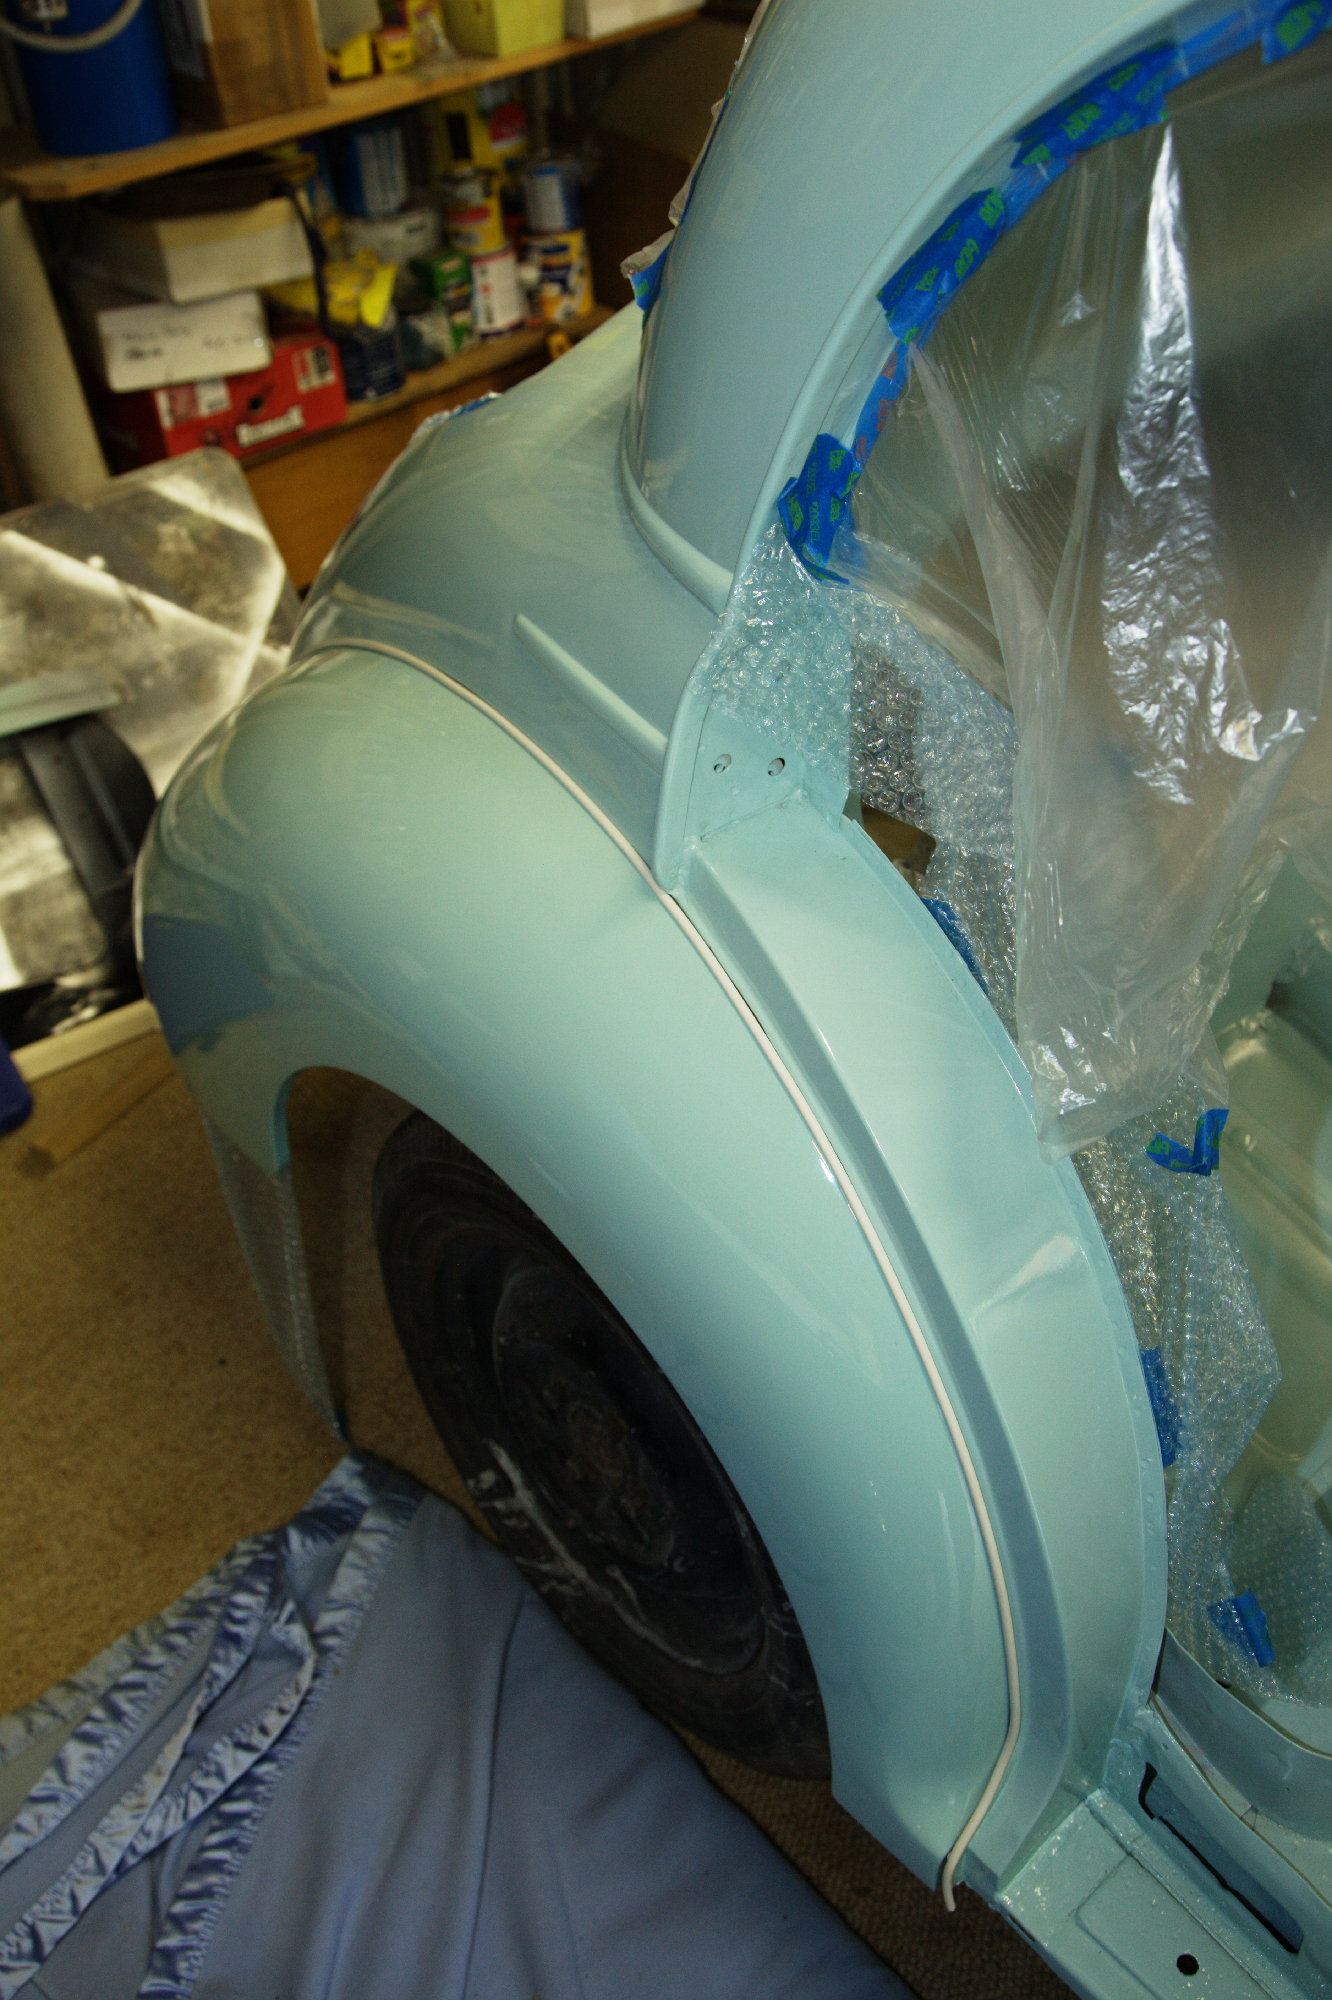
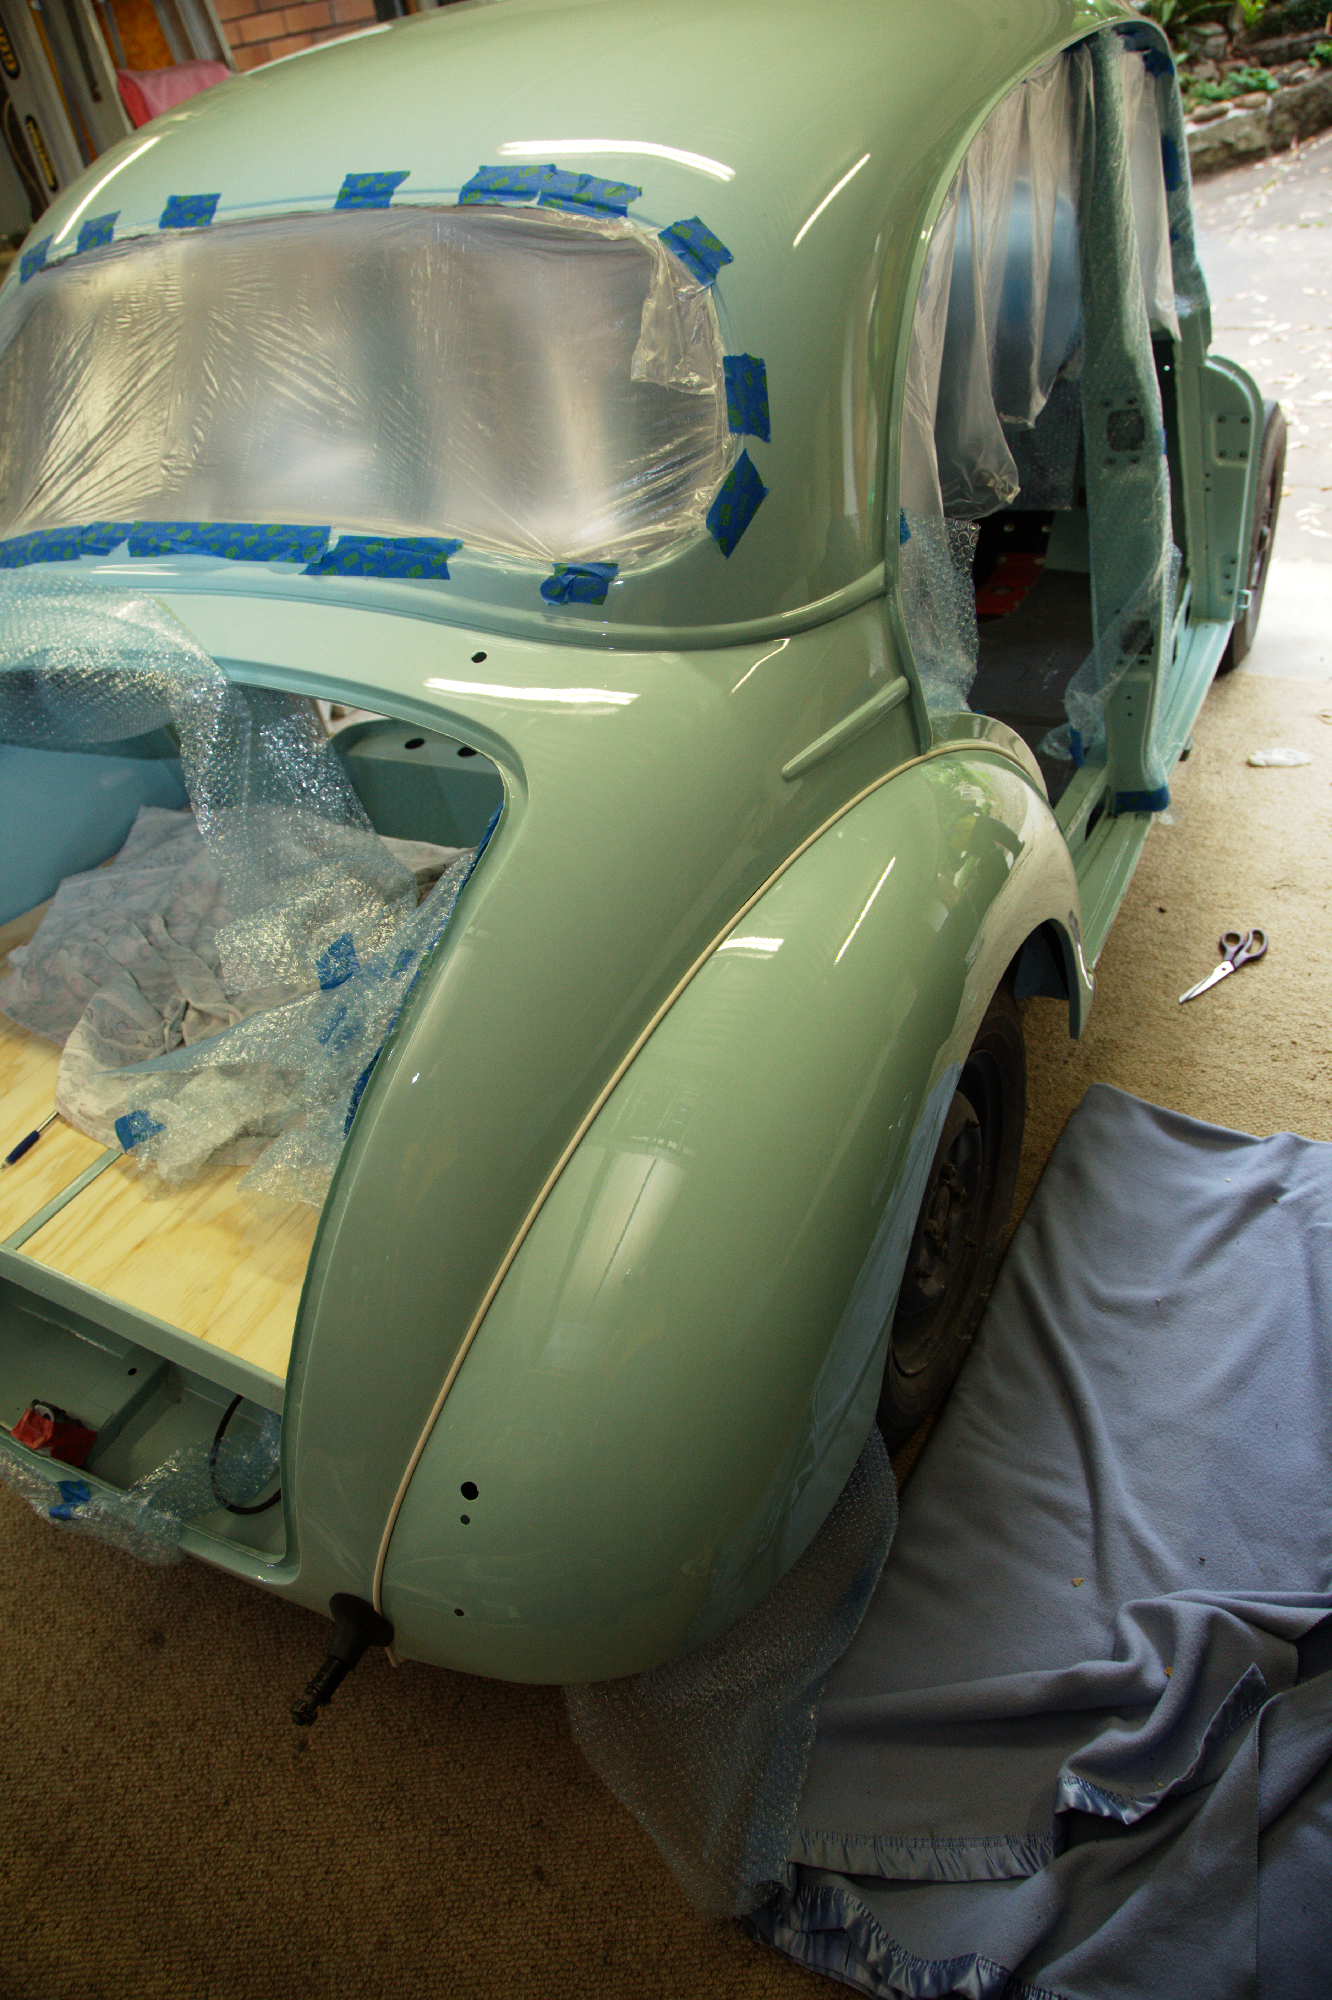
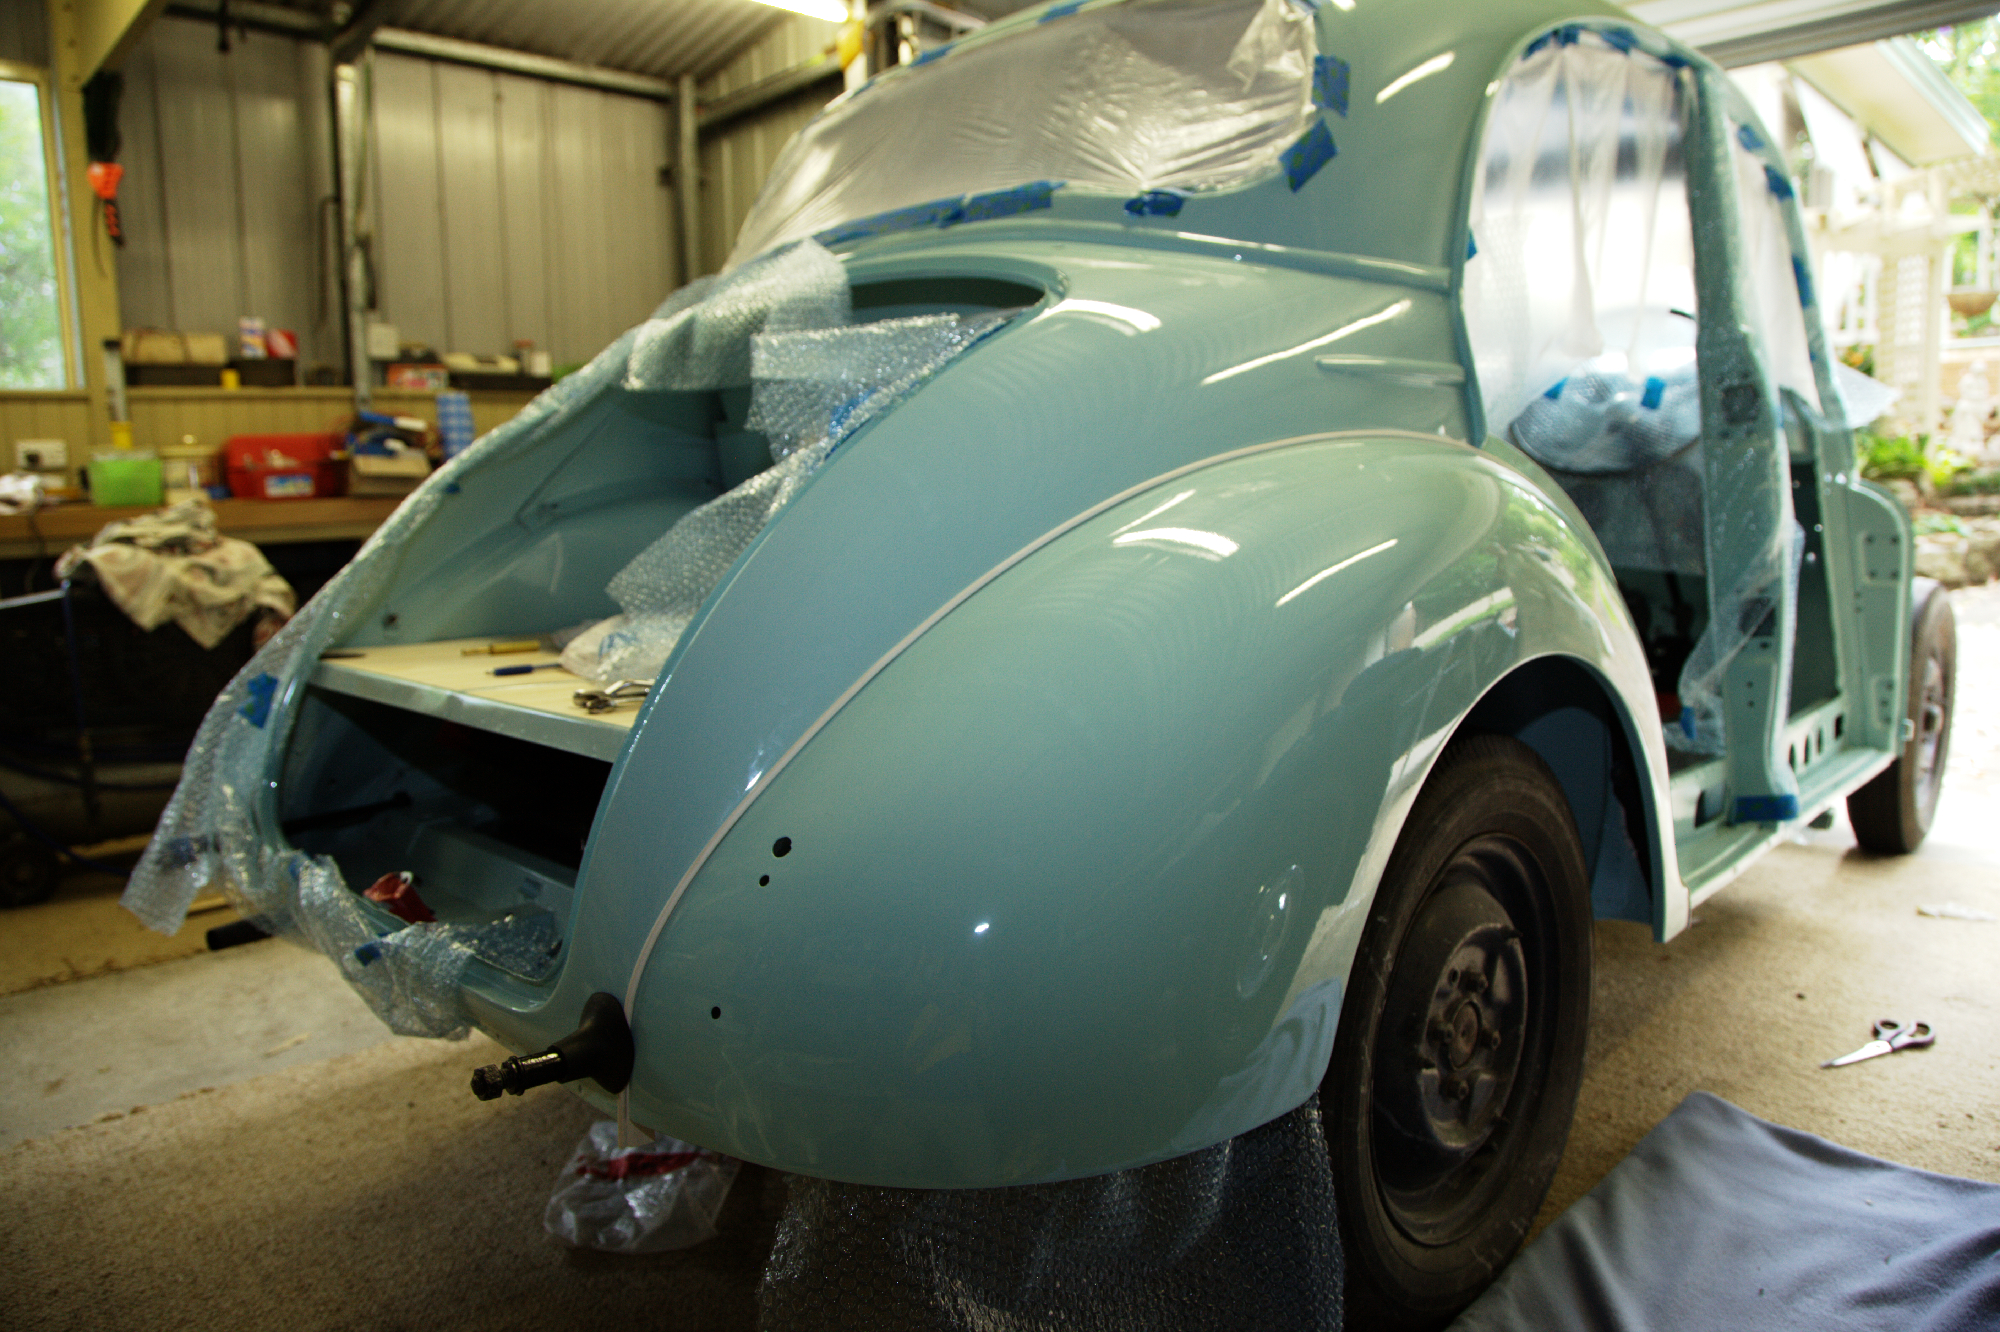
Well, After a year away at the panel and paint shop, Elsie has returned looking rather resplendent with no dents and a shiny new coat.
A big thanks to the guys at the Nowra Smash Repairs for the excellent job they did. It was good to have a team of guys who obviously took pride in their work on the job. Whilst 12 months seems like a long time, that is the arrangement that we had in place. In return for them having an “in betweener” to work on in the quiet times I was prepared to wait and the value for money was hard to beat.
So I’ve now taken two weeks leave from my day job to get Elsie back together with all the good bits fitted.
Job one was to do a walk around the car and take note of any little imperfections that needed attention. A few minor scratches on my interior and engine bay paint work needed attention so these have been prepared and (weather permitting) will be resprayed tomorrow.
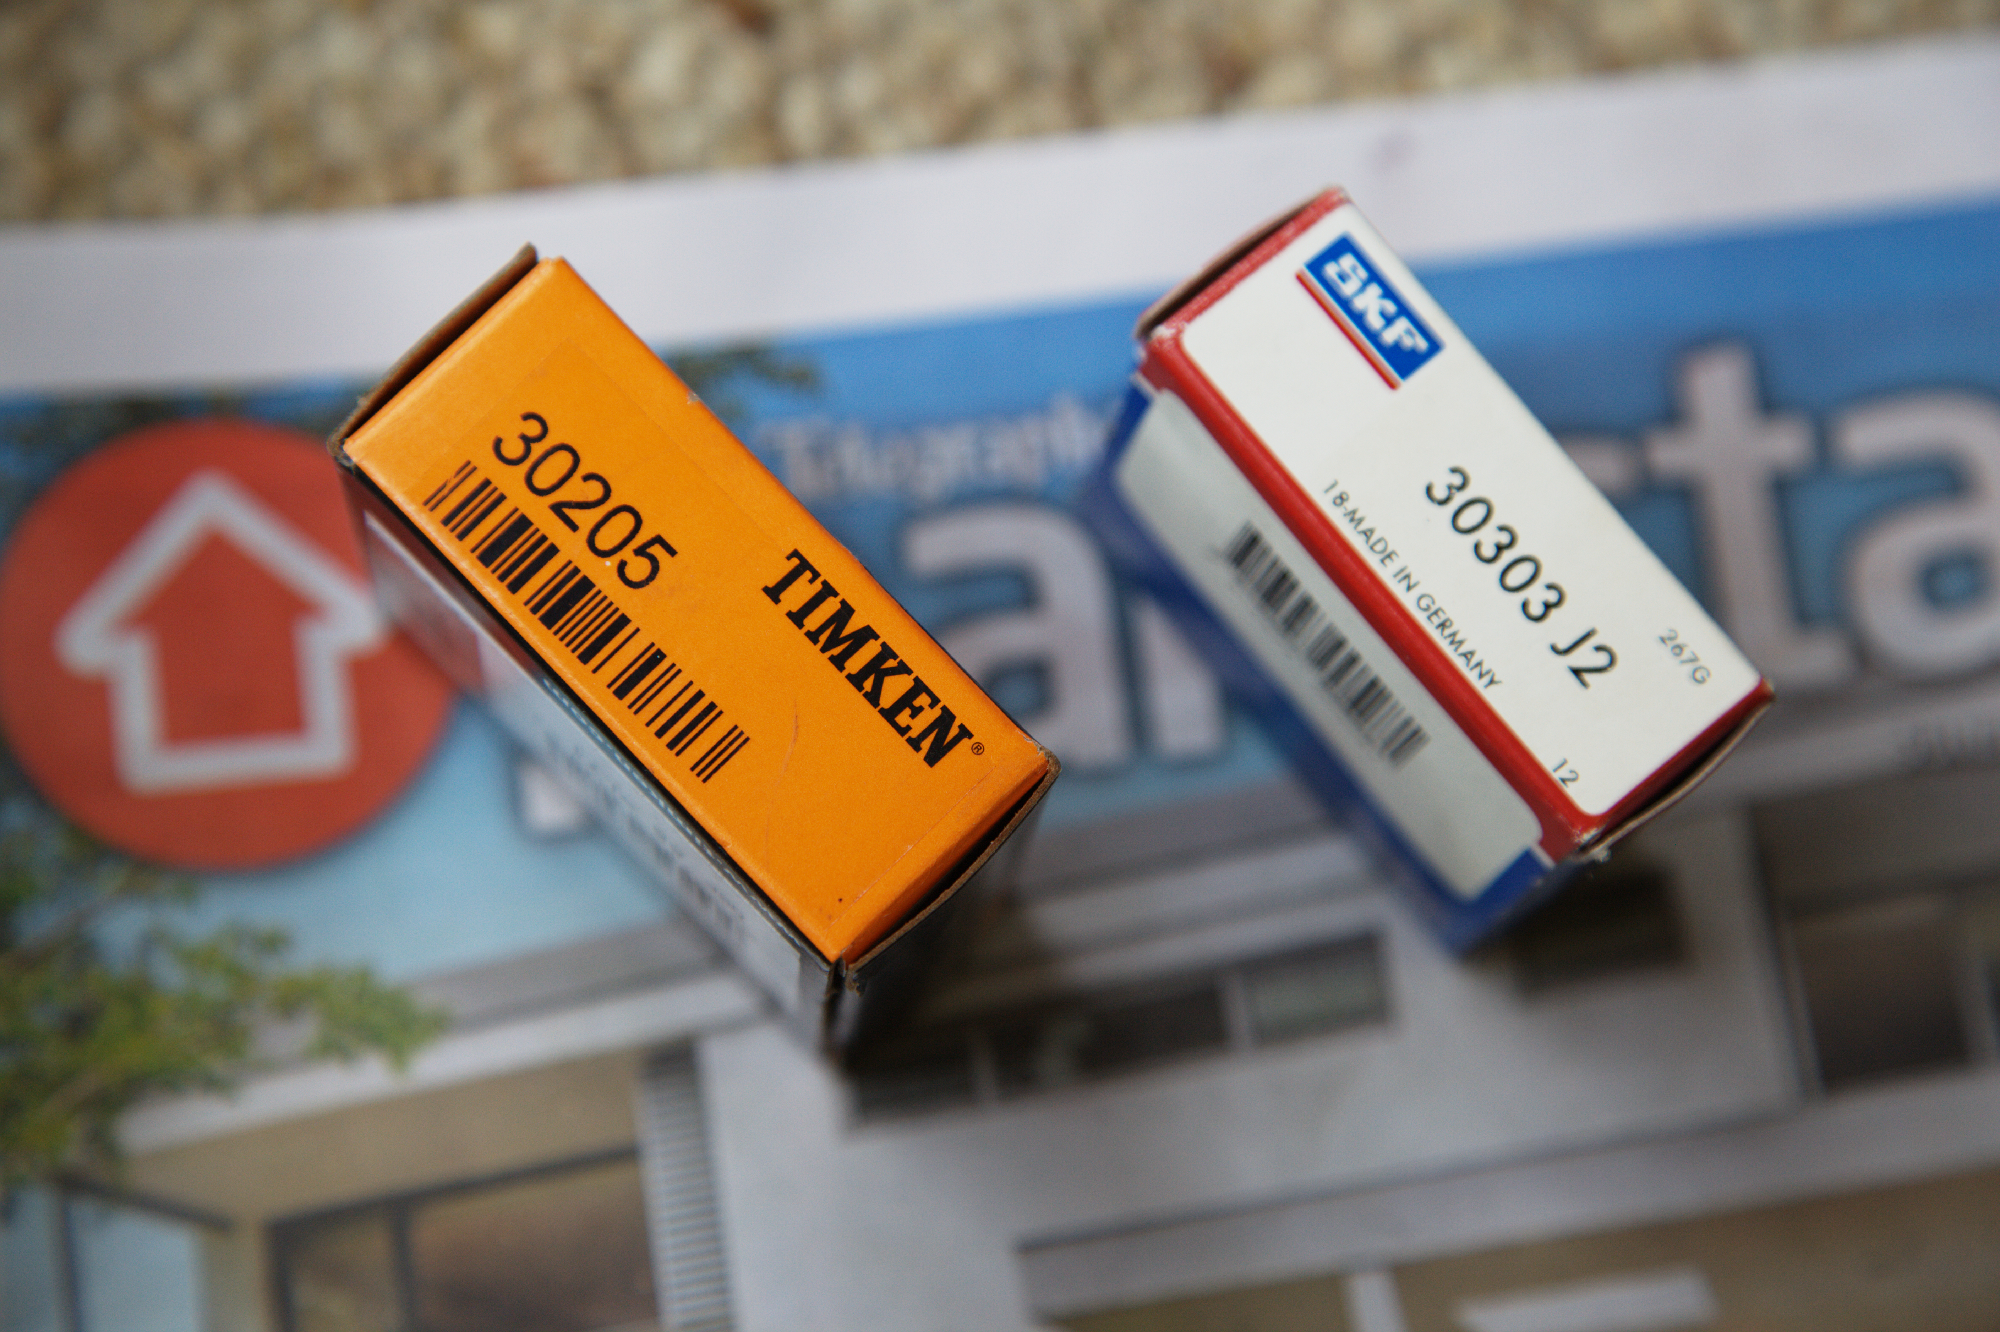
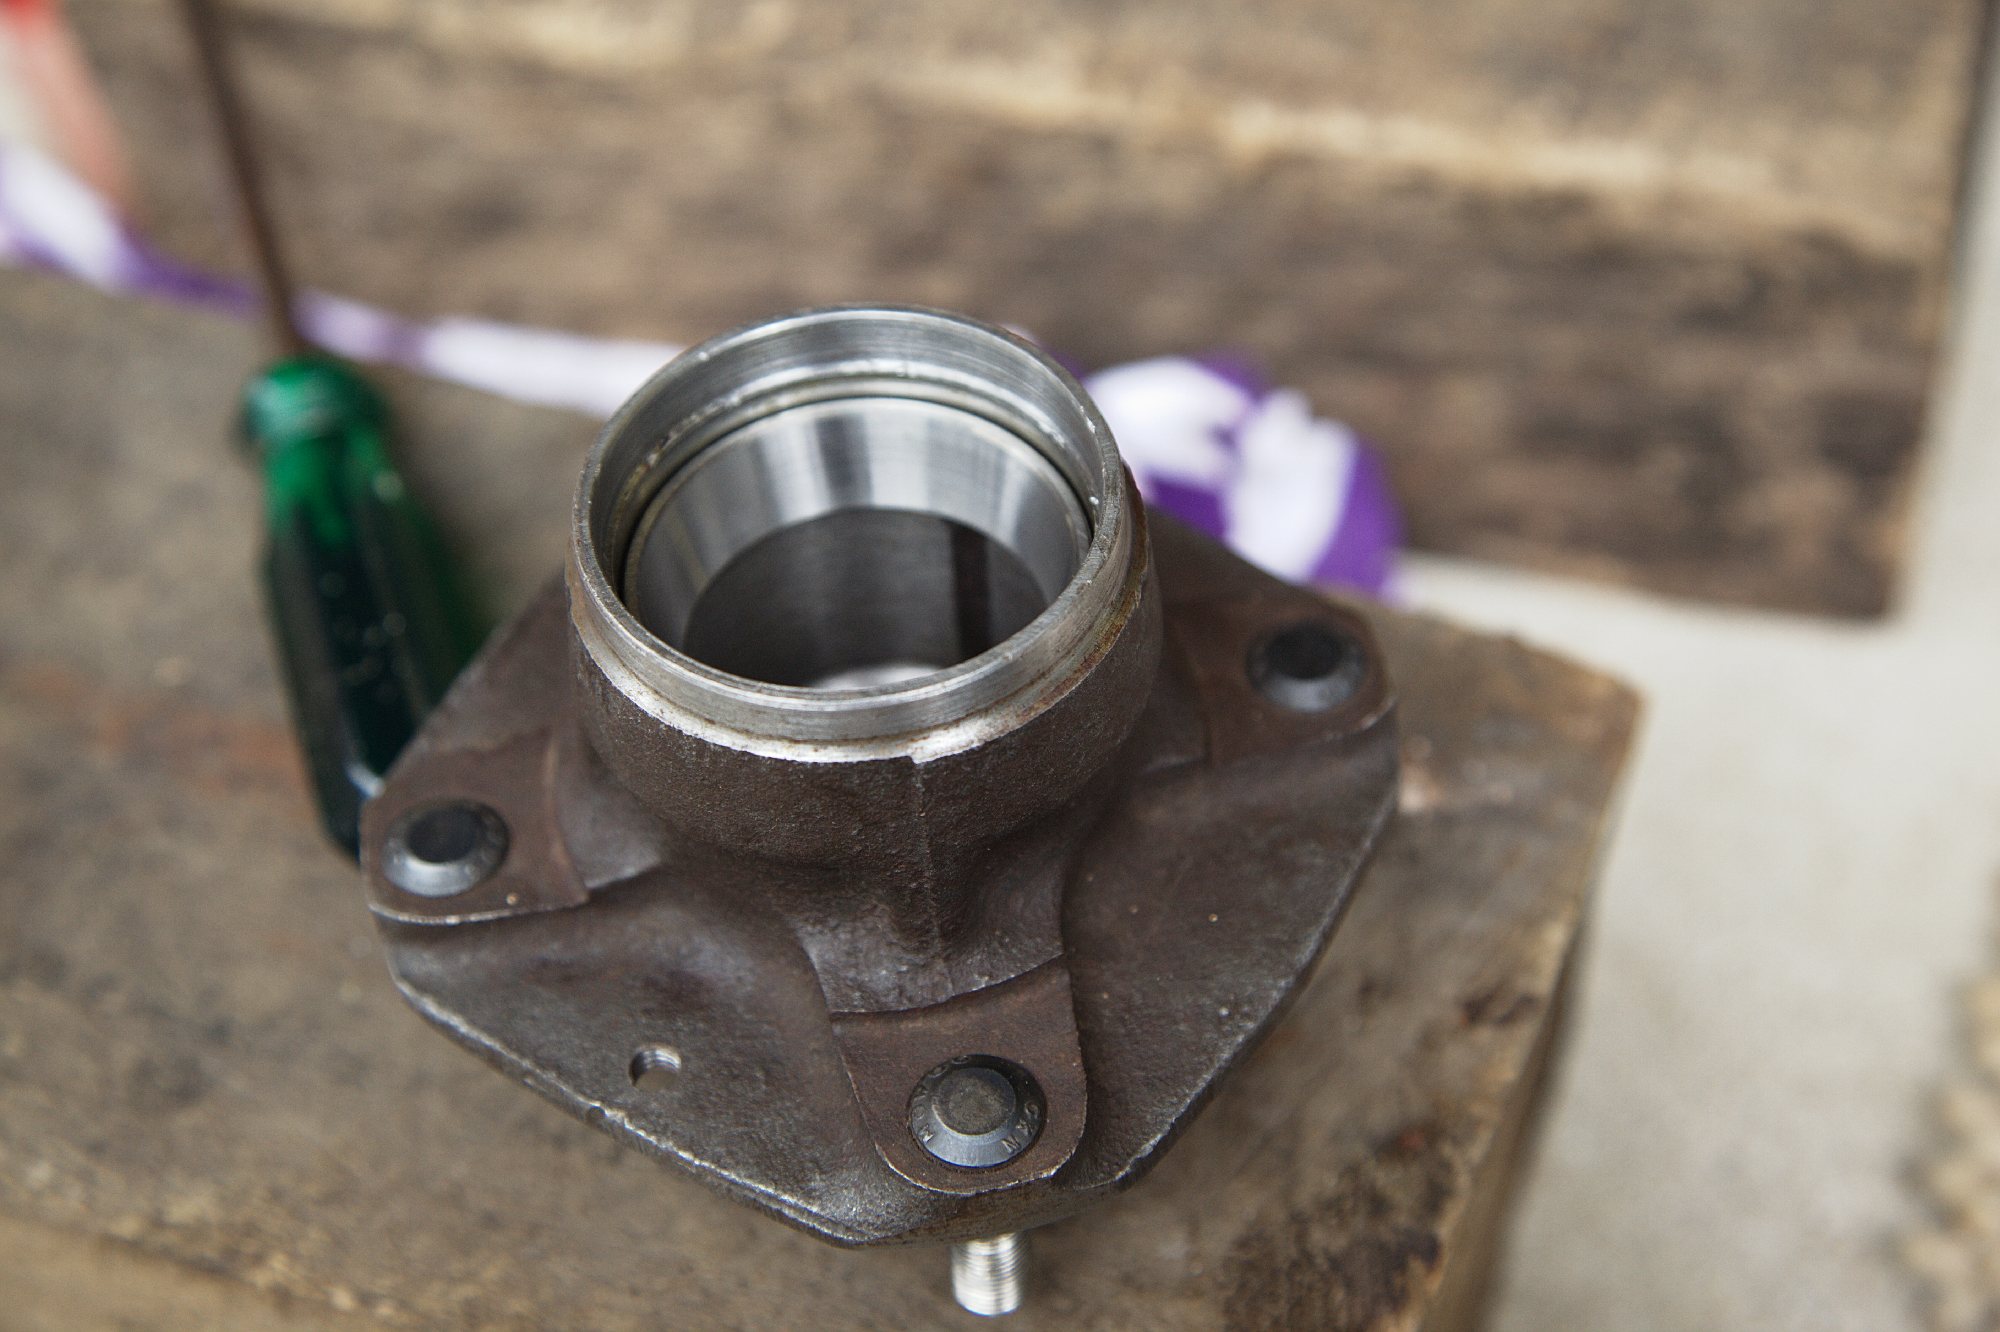
The front wheel bearing were not something we were happy with. Whilst they would have probably passed the registration inspection, there was just a little too much play for our liking. So, thanks to brother Paul for doing some research and coming up with the right tapered bearings. The thing to remember with these is you have to remove the internal spacer from the hub, otherwise the hole thing is pointless. Anyway, these were fitted with a bit of Lactate bearing compound to account for some minor wear in the internals of the hub and fitted back to the car. No play! perfect!
The underside of the turret was still just in primer so a coat of POR15 was applied to ensure rust was never going to be an issue. It was decided to also apply this product to the main section of the floor to give a bit more durability. This product is expensive but from all accounts it does the job better than most and it dries off to a high lustre hard surface.
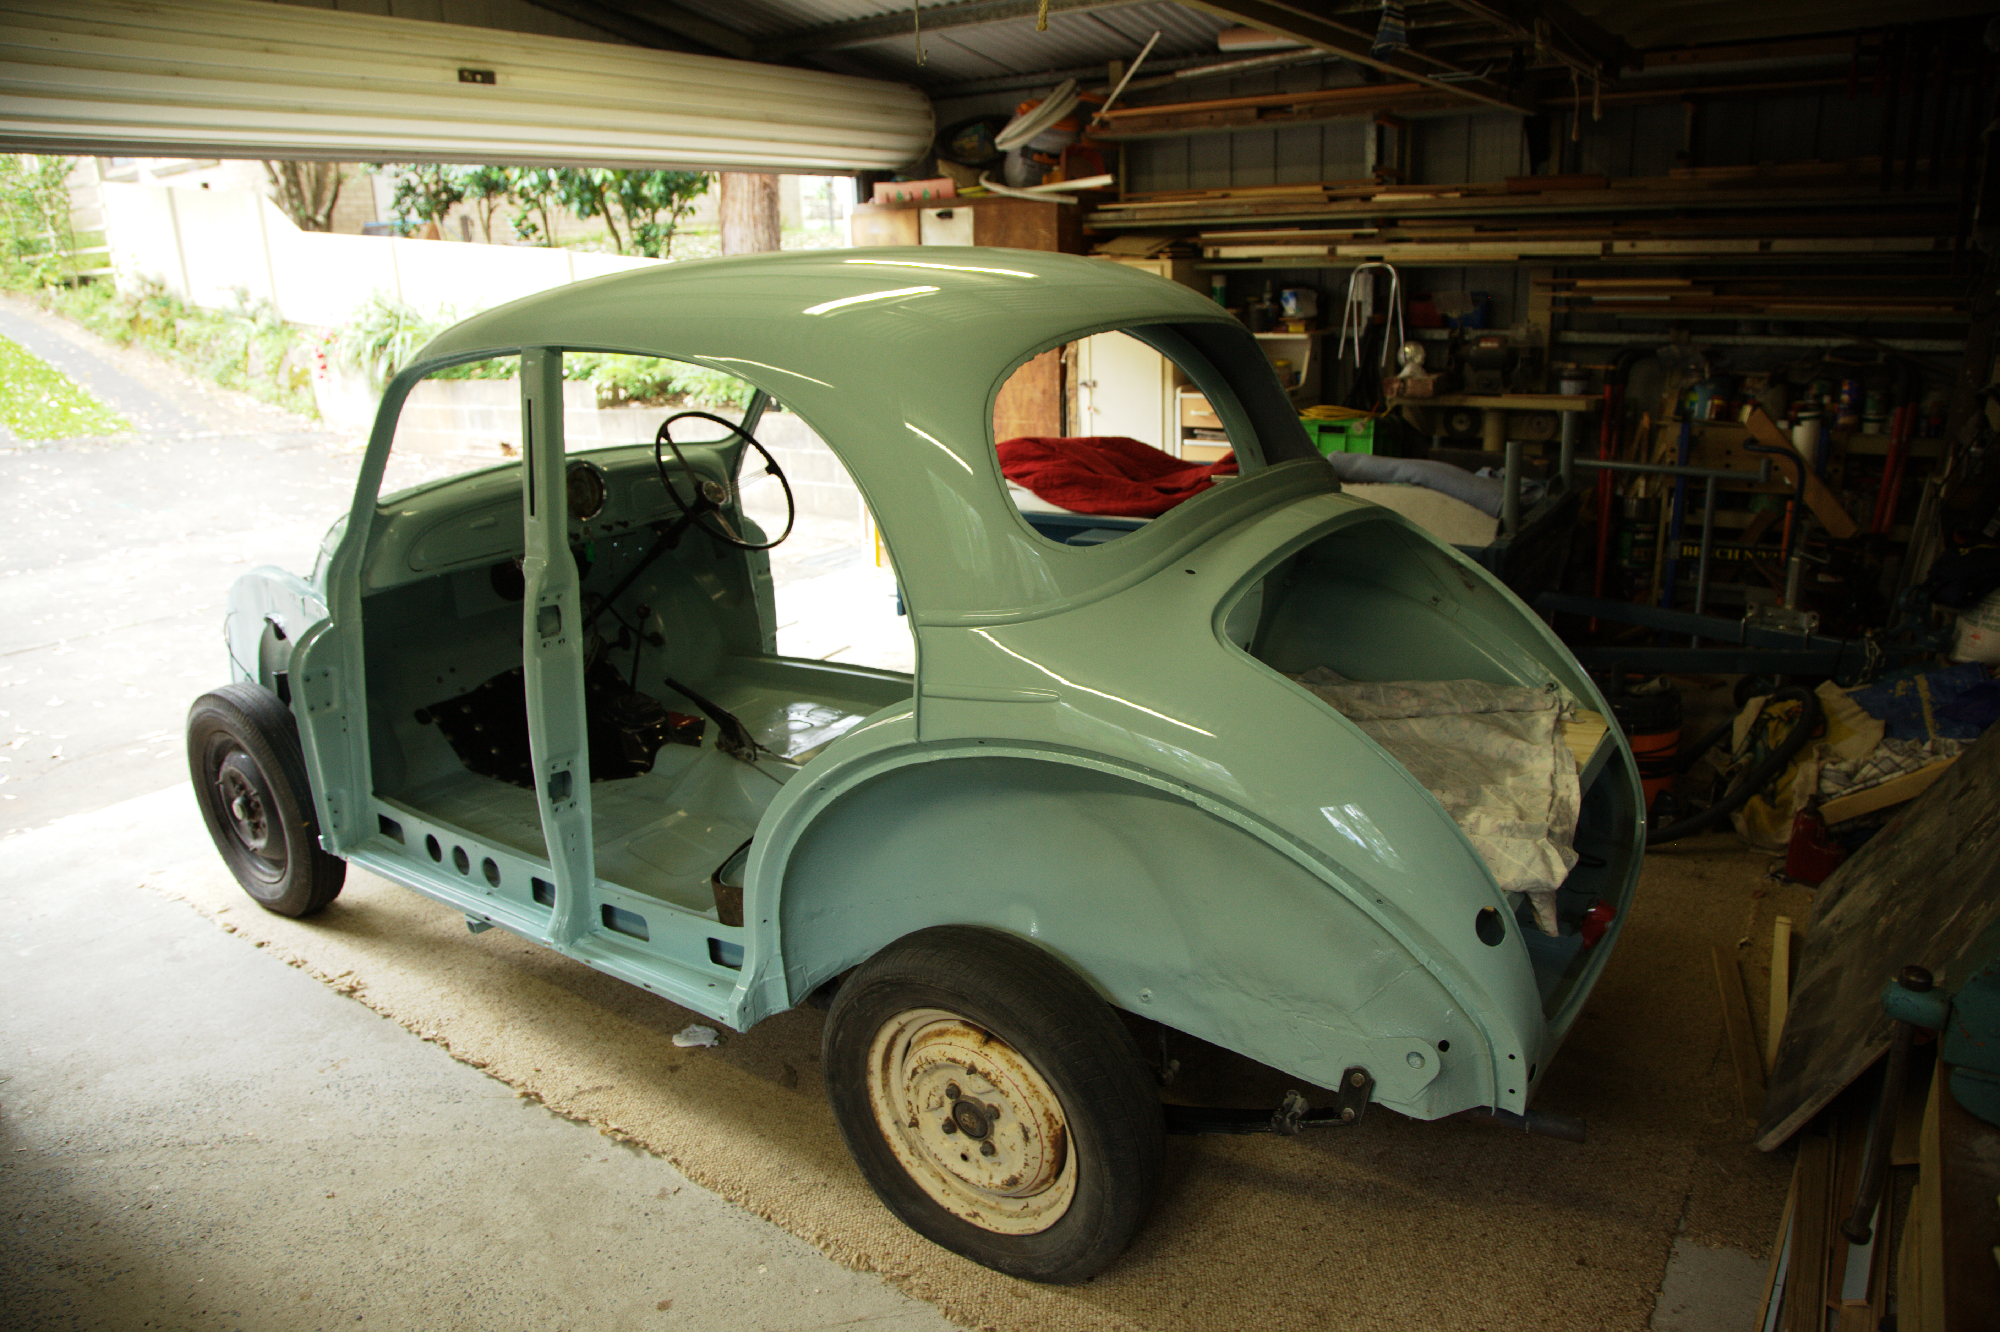
That all done it was time to start fitting some panels. The two rear guards were offered up after we went around and passed a tap through all the caged nuts to make sure they were nice and clean. New white beading was marked and whole punched to cater for the bolt, and all in all they went back on with very little struggle. Two hours and both guards were fitted.
I will be posting more of the process over the coming few weeks ….

07 Monday Nov 2016
Posted in Uncategorized
Tags
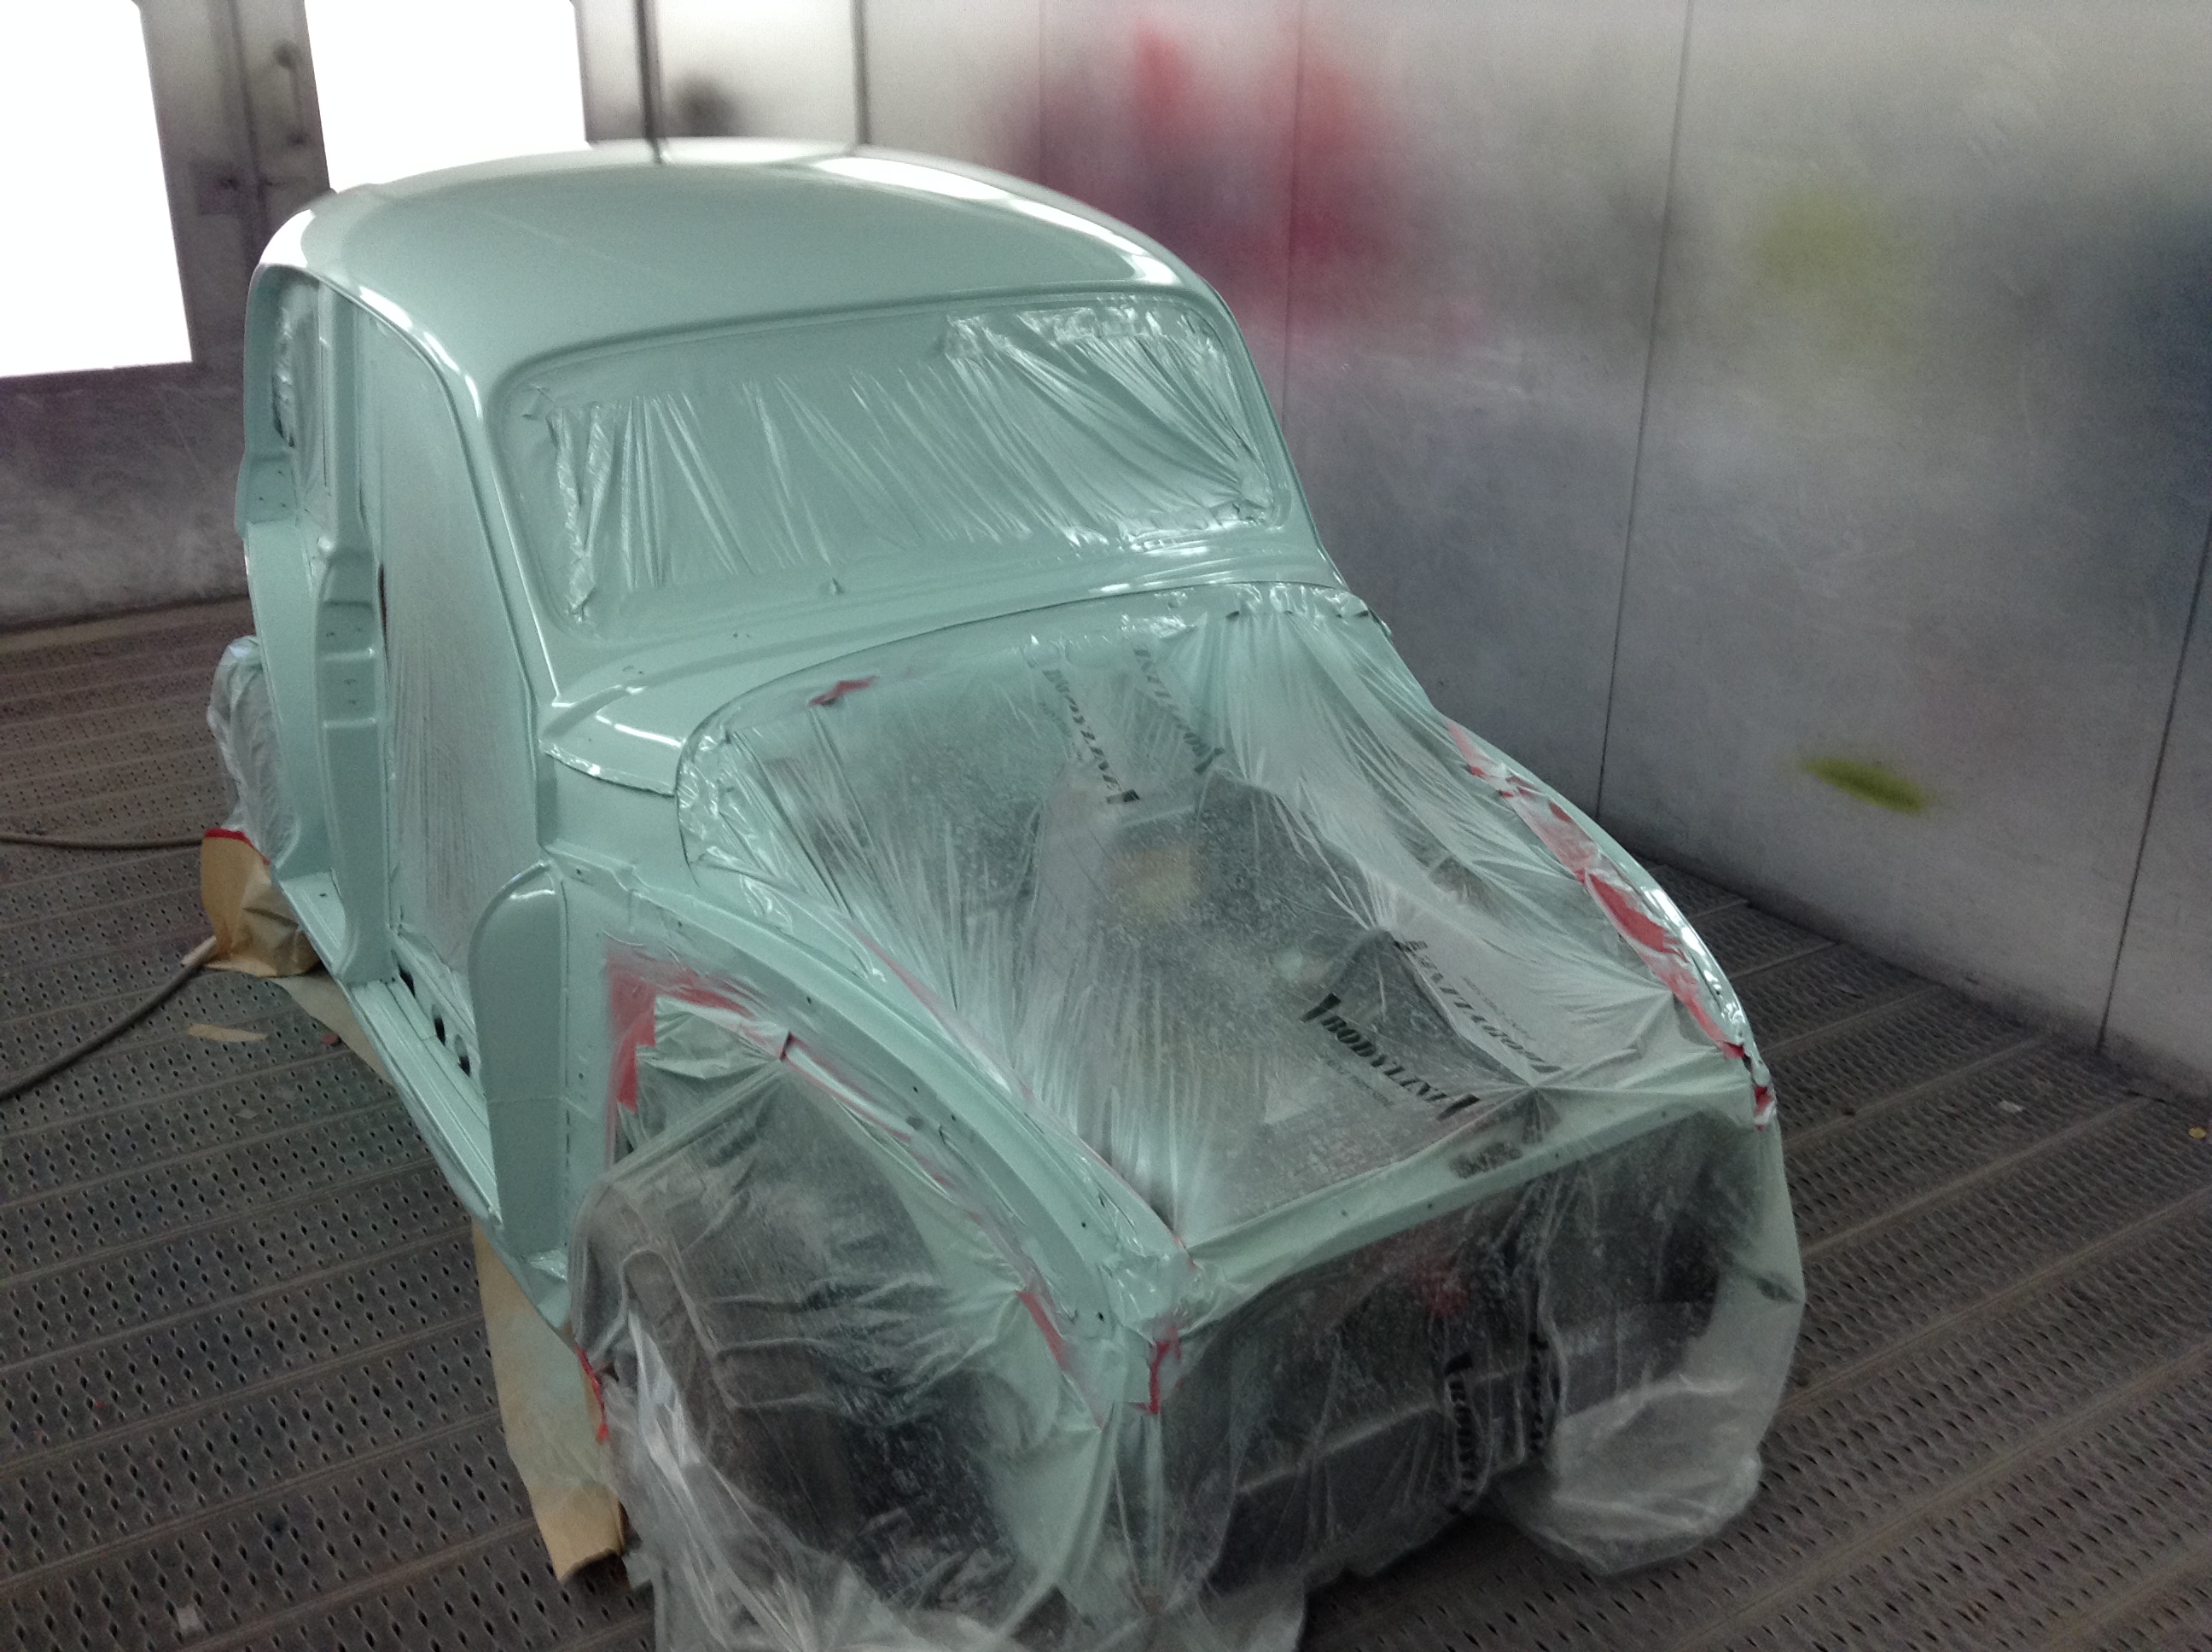
Approximately 32 years after turning (well breaking the rusty head off) the first bolt, a good 3 years after the final rebuild began in earnest and 12 months after going off to the body shop, this happened Saturday. Picking up the body this Friday (Weather permitting) and the body panels next week. I dropped in this afternoon to give Elsie the once over and she looks fantastic. I’ve got to say the boy have done an outstanding job on the panel and paint work. 


18 Thursday Aug 2016
Posted in Uncategorized
The latest update from the Panel Shop is that the car will be finished by the end of September. The exciting bit is about to begin!
See you with some photos in about 6 weeks.
Tim
